Usage Guide
Overview
The Usage section of this guide provides some instructions on using and configuring the Wallboard for Amazon Connect solution.
Wallboard - Sign in
1. Navigate to the Amplify domain your wallboard is hosted on. This will be emailed out to you once the build is complete.
2. Complete the sign-in process using the username (typically email address) and password as set by the administrator.
3. If this is the first time logging in, follow the steps to set a new memorable password for this account.
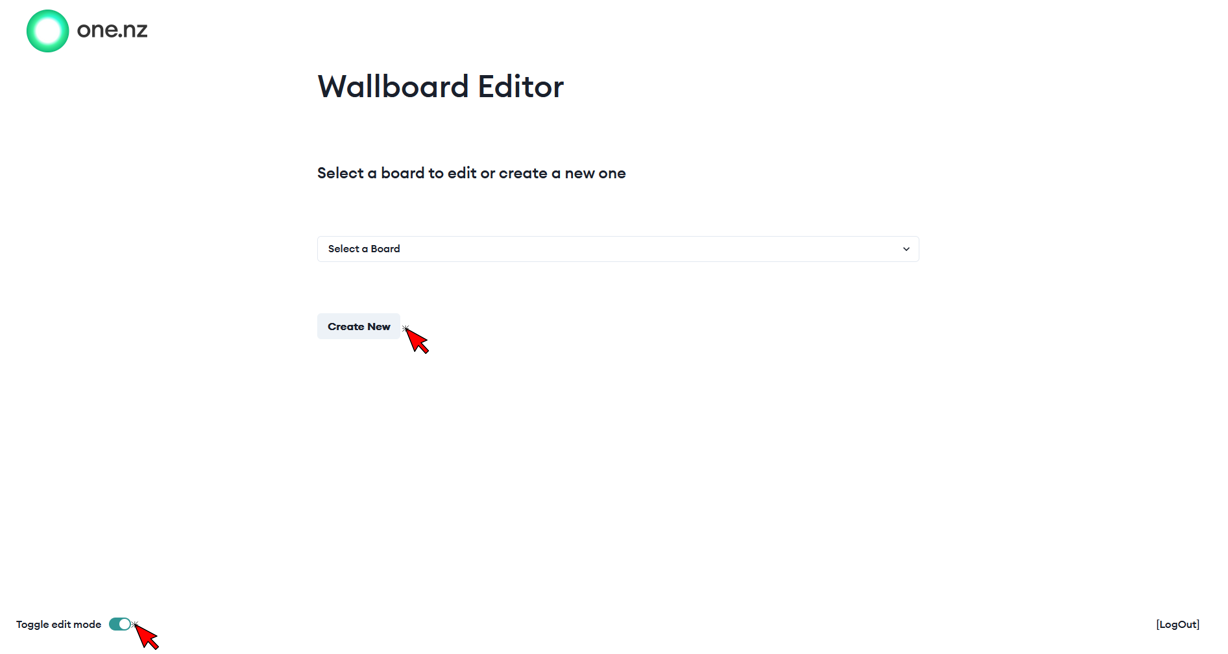
Wallboard - Create a new wallboard
1. Toggle the mode to the Edit Mode in the bottom left corner.
2. Select the Create New button.
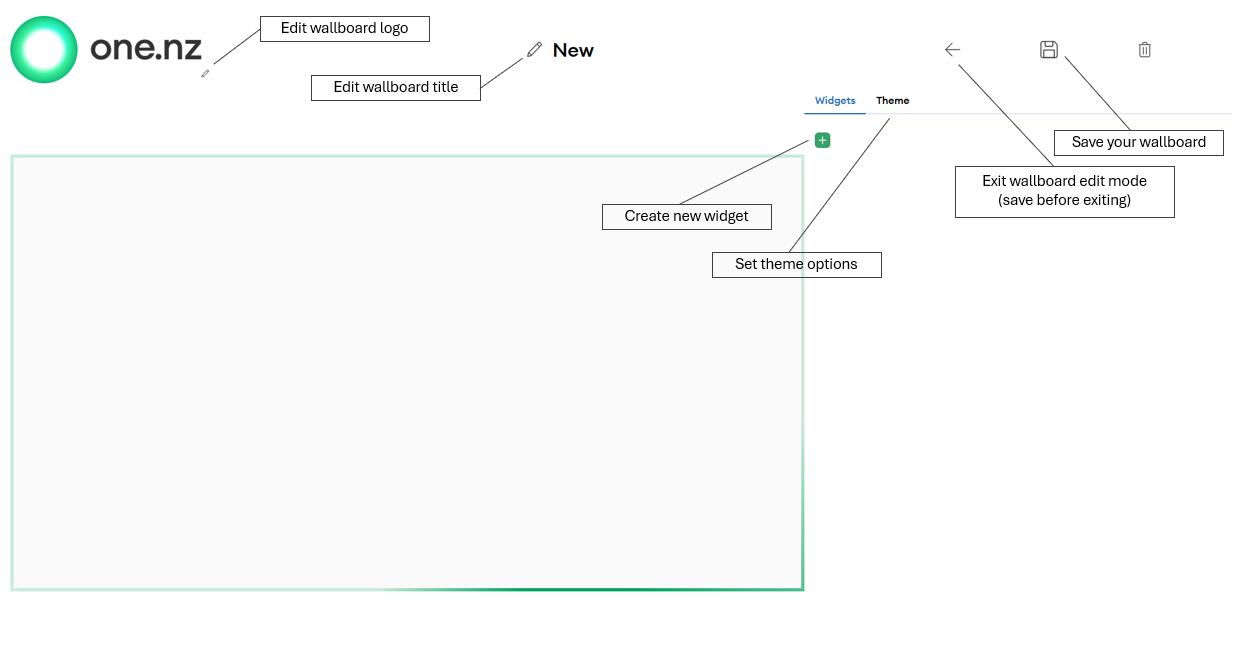
3. Create a title for your wallboard by selecting the edit (pencil) icon beside the default title 'New'.
4. Add a logo to your wallboard by selecting the edit (pencil) icon next to the default 'One NZ' logo.
5. Select the 'plus' icon on the right hand Widget menu.
6. Build a widget:
- Queue Selection - select/search for the queue to present metric data for. You can select multiple queues for aggregted data.
- Metric Selection - select the metric you wish to display. If you have selected multiple queues in the previous step, the aggregated metric options are reduced. For all options, select only one queue.
- Thresholds - select the options you would like for Tier 1 and 2 as applicable. For example, the metric 'Contacts In Queue' you could select 'greater than' for the condition and '10' for the value for Second Tier. This would set the widget to display Red when there is more than 10 contacts waiting in the queue you have selected.
- Widget Title - Set the title, typically the queue name. The Title is displayed at the top of widget, and the Metric is displayed at the bottom by default.
Widgets are auto placed on the wallboard with a maximum of 15 widgets per wallboard - 3 rows and 5 columns. They will self position depending on the number of widgets. You can move the widgets, using the up and down arrows once a widget is created. This will allow you position/order as required.
7. Set your theme, by selecting the theme tab, next to the Widgets tab. Use the colour picker tool for your background, Card, and Font. NOTE: If your background and text colour are the same or very similar, the title will not be visible.
8. Repeat step 6 for each widget required. And when done click the save icon in the top right to save your wallboard.
9. Select the back arrow, next to the save button, to exit the wallboard create/edit viewer.
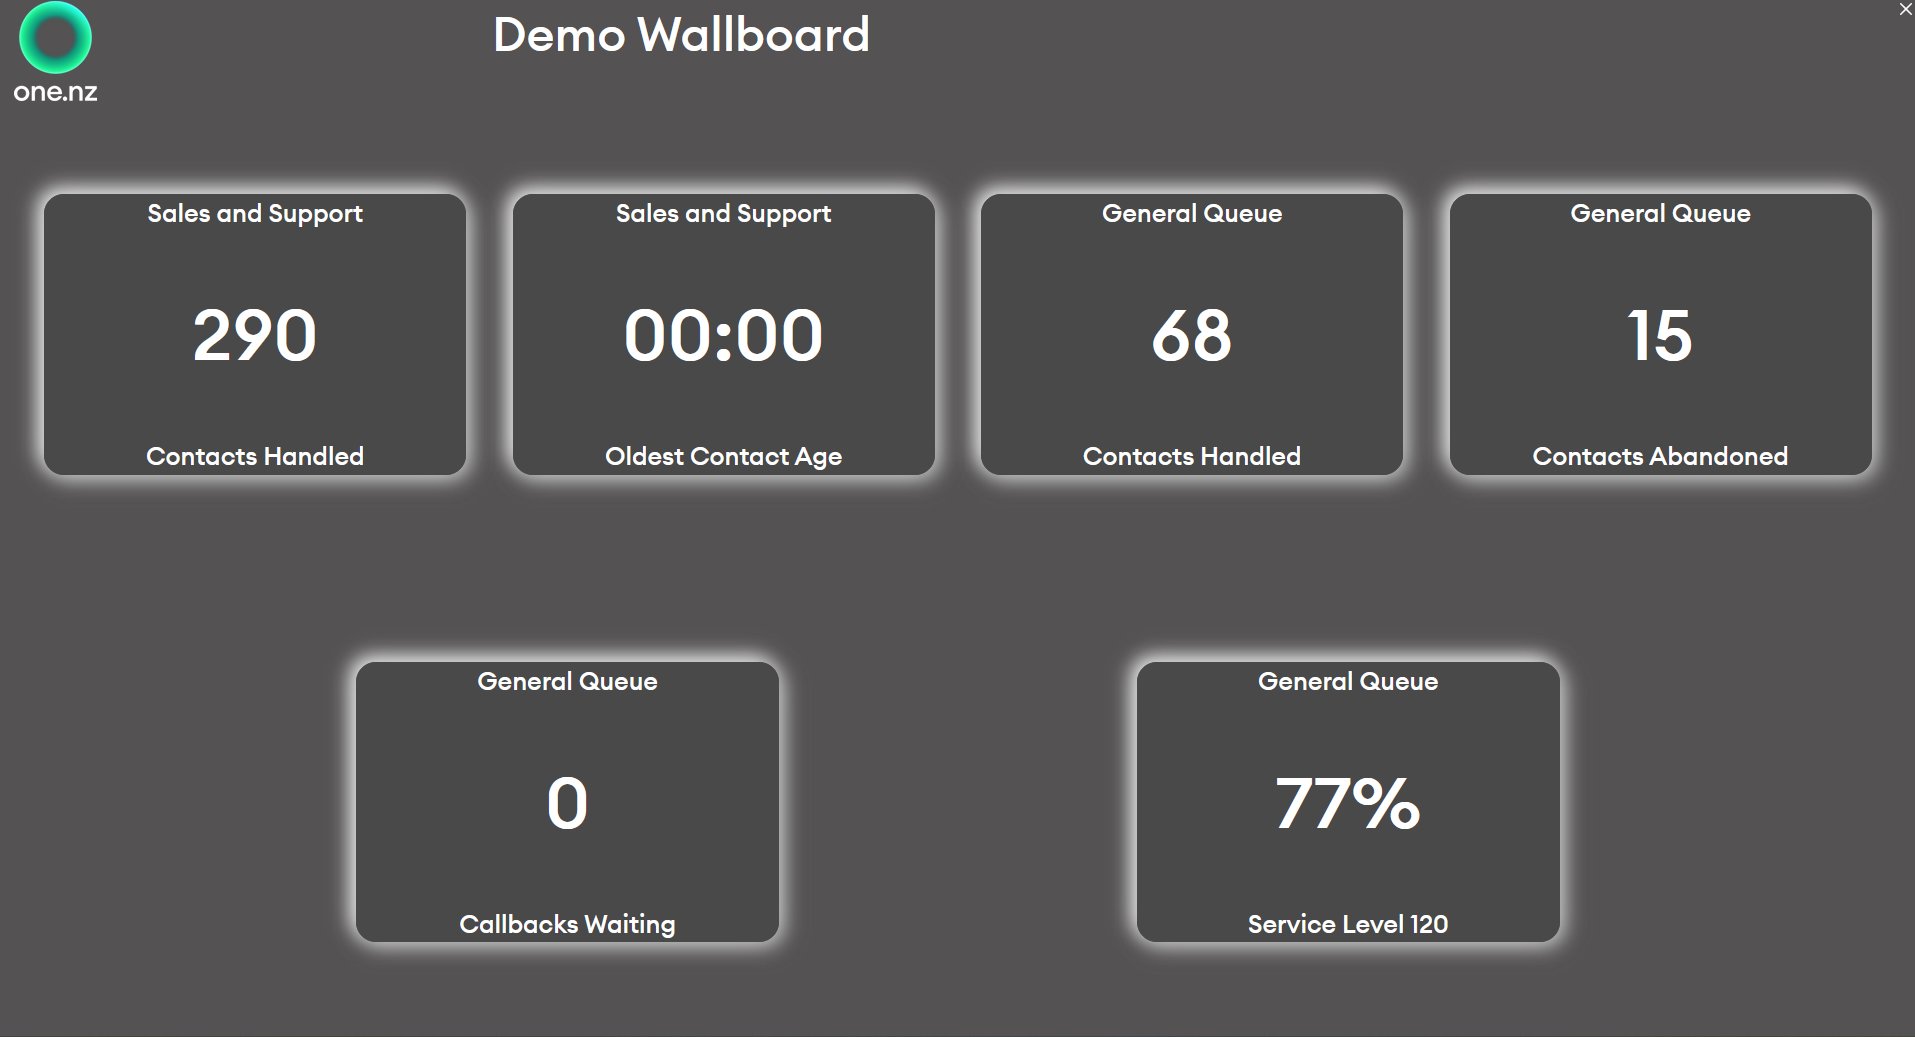
Wallboard - View a wallboard
1. Toggle off Edit Mode in the bottom left corner.
2. Select the wallboard you have created from the drop-down menu.
3. You can then full-screen the wallboard on your contact centre display.
4. To close the wallboard, select the 'X' in the top right corner. If you have selected a similar text and background colour, this may be difficult to see.
Wallboard - Edit an existing a wallboard
1. Toggle the mode to the Edit Mode in the bottom left corner.
2. Select the wallboard you wish to edit from the drop-down menu.
3. Edit the wallboad as required. For widgets, select the edit icon (pencil) on the widget requiring changes, in the right hand list of widgets.
4. Don't forget to save your changes before exiting the wallboard.

Wallboard - Static Viewer
You can share a wallboard in read-only mode using a direct static viewer link.
1. Get your Amplify domain (e.g., https://main.<AMPLIFY_ID>.amplifyapp.com). Replace <AMPLIFY_ID> with your actual Amplify app ID.
2. Retrieve the board GUID:
- Go to the AWS Console → DynamoDB → Table named BoardDefinitions-...
- Find your board entry; the id field is the GUID.
3. Build the static viewer URL:
- <amplify_domain>/static-viewer/?GUID=<GUIDID>
- Example: https://main.<AMPLIFY_ID>.amplifyapp.com/static-viewer/?GUID=abc123-xyz456
4. Share this link for read-only access to the wallboard.